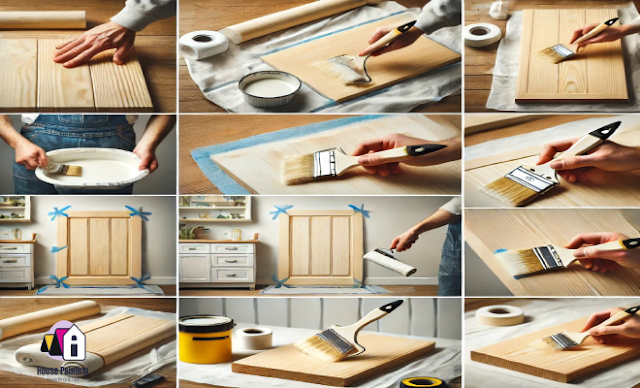
Painting wood can transform furniture, trim, cabinets, or any wooden surface, giving it new life and enhancing your decor. With the right tools, techniques, and preparation, you can achieve a smooth, durable finish that looks professional. Here’s a step-by-step guide to painting wood at home, along with tips on choosing the best products for lasting results.
1. Preparing the Wood for Painting
Preparation is crucial for a smooth finish, as paint adheres better to a clean, properly prepared surface.
- Clean the Surface: Start by cleaning the wood with a mild soap and water solution to remove dirt, grease, and dust. Let it dry completely.
- Remove Old Paint (if needed): If there’s peeling or flaking paint, remove it with sandpaper or a paint stripper. This ensures the new paint adheres well.
- Repair Imperfections: Fill any holes, cracks, or dents with wood filler. Let the filler dry and sand it down to match the surrounding surface.
2. Sanding the Wood Surface
Sanding smooths out imperfections and helps the primer and paint stick to the wood.
- Use the Right Grit: Begin with a medium-grit sandpaper (around 120 grit) to even out the surface. Finish with fine-grit sandpaper (180-220 grit) to smooth the wood.
- Remove Dust: After sanding, use a damp cloth or tack cloth to remove any dust, as it can affect the paint's finish.
3. Applying Primer on Wood
Primer is essential as it seals the wood, prevents stains from bleeding through, and provides a good base for the paint.
- Choose the Right Primer: Use an oil-based or shellac-based primer for durability, especially if the wood has knots or stains. For indoor projects, water-based primers are low-odor and effective.
- Apply a Thin Coat: Use a paintbrush or roller to apply a thin coat of primer. Allow it to dry completely before proceeding.
4. Choosing the Best Paint for Wood
Selecting the right paint for your project will determine the final look and durability of your paint job.
- Latex Paint: Ideal for indoor wood surfaces like trim, doors, and furniture, latex paint is easy to work with and cleans up with water.
- Oil-Based Paint: Often chosen for outdoor wood surfaces or high-use items, oil-based paint is durable and provides a hard, glossy finish.
- Chalk Paint: Chalk paint is popular for giving wood furniture a vintage or matte look without extensive prep.
5. Applying Paint on Wood
To achieve a professional finish, apply the paint in thin, even coats.
- Brush or Roller?: Use a brush for intricate areas and a roller for larger surfaces to avoid brush marks. Use foam rollers for a smooth finish.
- Apply Thin Coats: Apply thin coats of paint, allowing each layer to dry before adding the next. This prevents drips and helps achieve a more durable finish.
- Multiple Coats: Depending on the paint and color used, apply 2-3 coats for a solid finish. Darker colors may require additional coats for full coverage.
6. Sealing and Protecting Painted Wood
A clear sealant can protect your paint job, especially for items that will get a lot of use or outdoor exposure.
- Choose a Sealant: For a matte finish, choose a clear matte sealer; for a shiny finish, use a gloss polyurethane. Outdoor wood surfaces often require a weatherproof sealer.
- Apply a Thin Layer: Use a brush to apply a thin, even layer of sealant over the painted wood. Let it cure according to the product instructions.
7. Common Wood Painting Mistakes and How to Avoid Them
Even with the best intentions, mistakes can happen. Here’s how to avoid the most common pitfalls:
- Skipping Primer: Primer provides a solid foundation and helps with paint adhesion. Skipping it may result in peeling paint or visible stains.
- Using a Dirty or Dusty Surface: Always clean and sand your surface before starting to avoid an uneven finish.
- Applying Thick Paint Coats: Avoid thick layers, as they can cause drips. Thin coats provide better coverage and durability.
- Rushing Drying Time: Allow each layer to dry completely before adding the next to avoid smudging or uneven finishes.
8. Tips for a Smooth Finish
Achieving a flawless finish can be simple with a few additional tips:
- Feather the Edges: Use a light touch to blend the paint’s edges, particularly around corners, for a seamless look.
- Light Sanding Between Coats: For a very smooth finish, lightly sand the painted surface with fine-grit sandpaper between coats.
- Avoid Humidity and Extreme Temperatures: These conditions can cause the paint to dry unevenly or crack. Try to paint in a controlled environment.
Conclusion
Painting wood at home is an excellent DIY project, whether you’re refreshing a piece of furniture or repainting trim. With the proper preparation, tools, and techniques, you can achieve a smooth and durable finish. Remember to take your time, apply thin coats, and allow adequate drying time between layers for the best results. Happy painting!

