
Paint cracks can appear on walls, ceilings, and other surfaces due to factors such as humidity, poor surface preparation, or age. Addressing these cracks promptly and effectively can restore the appearance of your painted surfaces and prevent further damage. Here’s a comprehensive guide on how to repair paint cracks and achieve a smooth, long-lasting finish.
1. Identify the Cause of Paint Cracks
Understanding what caused the cracks helps determine the best repair approach and prevents recurrence. Common causes include:
- Humidity or moisture exposure: Often leads to peeling or cracking, especially in bathrooms or kitchens.
- Aging paint: Old paint loses flexibility and cracks over time.
- Poor surface preparation: Without cleaning, priming, or proper surface treatment, paint won’t adhere well.
- Temperature fluctuations: Extreme heat or cold can cause paint to contract or expand, leading to cracking.
2. Gather the Necessary Tools and Materials
For an effective repair, you’ll need the following items:
- Fine and medium-grit sandpaper (120-180 grit)
- Filler or spackling compound for larger cracks
- A putty knife
- Primer (especially for high-humidity areas)
- Paintbrushes and paint rollers
- Paint that matches the original color and finish
- Optional: Crack sealer for deep or stubborn cracks
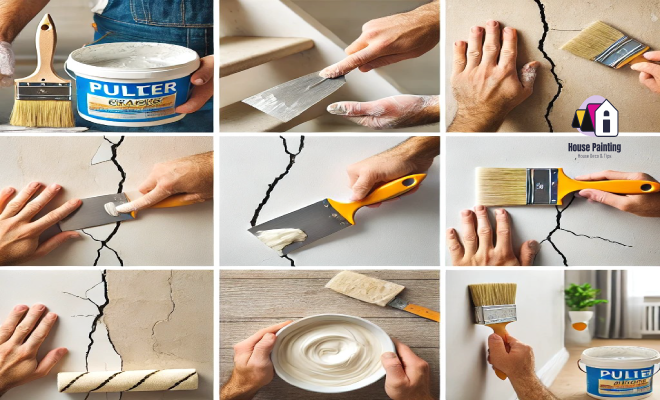
3. Prepare the Cracked Area
- Clean the Surface: Remove dust, grime, and any loose paint particles from the cracked area. Use a damp cloth or sponge and let it dry completely.
- Sand the Crack: Gently sand the edges of the crack using medium-grit sandpaper. This smooths the edges and prepares the surface for filler.
4. Fill and Smooth the Cracks
- Small Cracks (Hairline Cracks): For small cracks, apply a thin layer of filler or spackling compound over the crack using a putty knife. Press firmly to ensure the filler penetrates the crack, then smooth the surface with the knife.
- Large Cracks or Deep Cracks: If the crack is larger, apply multiple layers of filler. Allow each layer to dry before applying the next. For deep cracks, a crack sealer may be necessary to prevent future cracking.
- Sand After Drying: Once the filler is dry, use fine-grit sandpaper to smooth the area. Wipe away any dust with a damp cloth.
5. Apply Primer to the Area
Primer helps with paint adhesion and seals the repair. Use a primer that suits the surface type (e.g., moisture-resistant primer for bathrooms or kitchens). Apply a thin coat and allow it to dry fully.
6. Repaint the Area
- Use Matching Paint: Select a paint that matches the original in both color and finish. This ensures that the repaired area blends seamlessly with the surrounding wall.
- Apply Thin Coats: For a smooth finish, apply the paint in thin coats with a brush or roller, allowing each coat to dry completely before adding the next. Typically, two coats are sufficient for full coverage.
- Feather the Edges: Feather the paint around the repair edges to blend it with the original paint, avoiding a noticeable patch effect.
7. Prevent Future Paint Cracks
- Control Humidity: Use a dehumidifier or exhaust fan in humid areas to reduce moisture and prevent peeling.
- Allow Proper Drying Time: When painting new surfaces, ensure each paint layer dries completely before applying the next.
- Use Quality Primer and Paint: High-quality materials are less prone to cracking and provide better flexibility.
- Seal Exposed Surfaces: In high-traffic or moisture-prone areas, apply a clear sealer for added protection.
Conclusion
Repairing paint cracks requires careful preparation, the right tools, and attention to detail. By following these steps and using high-quality materials, you can effectively restore cracked paint and ensure it remains flawless. With preventative measures, such as controlling humidity and using durable paint, you can reduce the risk of cracks reappearing, preserving your surfaces for years to come.